There’s nothing better than freshly baked bread, and even more so when you’ve made it yourself. Once you’ve learnt the basic skills there are so many different types of bread to try, from quick and simple soda breads to rich and indulgent brioches, and everything in between. Plus, baking bread is such a relaxing and joyful thing to do-it’s the perfect way to press pause on the rush of everyday life.
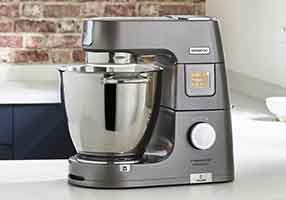
In this guide you will learn all you need to know to bake the perfect loaf, from bread making techniques to how and when to use different flours or ingredients. Taking you step by step through one of our classic bread recipes we’ll show you how using one of our stand mixers with a dough hook attachment will help make baking bread quicker and easier. We’ve also gathered together some of the most commonly asked bread making questions to help you on your way.
Welcome to the wonderful world of bread making- warning: it’s pretty addictive.
How to make bread
If you’re new to making bread, it’s best to start with a simple recipe like this one for Sourdough. A fail-safe crowd pleaser, this bread is ideal for sandwiches, toast or for dunking in soup. With only a few ingredients it’s cost effective and a delicious, popular recipe to make time and time again
Ingredients
For the bread
350ml water
550g strong white flour, plus a little extra for dusting
1 tsp salt
300g starter (see our recipe below)
For the starter
250g strong white bread flour
250g dark rye flour
Step one – Mixing the bread dough
To make the sourdough loaves add the water, 500g strong white bread flour and salt to the bowl. Pour in 300g of the starter, attach the dough hook and knead well on speed 1 for 10/15 minutes, until you have a strong, smooth and elastic dough. Kneading is the process which develops the gluten in the dough, either by working it with your hands or in a mixer. It’s crucial to successful bread-making because it’s the gluten that gives the dough its elasticity and stretch.
Step two – Kneading the dough
Having kneaded your ingredients using your stand mixer Remove the bowl and cover with a damp cloth and leave to rise for 3 to 4 hours
Kneading your dough by hand can be a wonderfully therapeutic and satisfying process. But it also takes a bit of effort, and it can’t be rushed! Using a mixer does the hard work for you, and makes it a lot quicker too. And you will still have plenty of opportunities to experience the tactile joys of working with the dough when you’re proving and shaping it.
Step three– Prove the dough
Once your dough has been mixed and kneaded it needs to be left to rise, or prove. During proving the yeast feeds on the nutrients in the flour and produces bubbles of carbon dioxide, which causes the dough to rise. This is important as it will make it much easier to handle and shape.
Flour a work surface and remove the dough from the bowl. Divide the dough into two, knock the air out and shape into buns. Lightly oil two bowls and place the dough into the bowls, cover with a tea towel and leave for three hours to prove for an hour in a warm, draught-free room. The ideal temperature for proving bread is around 21℃- if it’s too cold it will take longer for the dough to rise. Alternatively, if you have one of our newer kitchen machines you can use the dough prove setting, which will enable you to set the ideal temperature and stirring speed.
How long your bread will need to prove will vary from recipe to recipe- some quick breads only need around 30 minutes, while it’s recommended enriched doughs such as brioche are left to prove overnight to enhance flavour. But as a general guide most doughs need to be left until they have at least doubled in size. Putting a mark on the side of your bowl or taking a picture of the dough on your phone will help you gauge this.
Step four – Preparing to bake your bread
Heat the oven to 250°C and line a baking tray with baking paper.
Remove the dough from the bowls and place onto a baking tray, give a good dusting of flour and score a cross in the top of each loaf.
Boil the kettle, pour some of the water into a shallow baking tray and place in the bottom of the oven (this creates steam to help make a crust).
Bake the loaves in the oven for 35 minutes or until the bottom sounds hollow when tapped.
Leave to cool on a wire rack for about an hour
Sourdough starters
Sourdoughs are created using a ‘starter’ and help to develop the flavour of the bread. You can keep your starter for as long as you wish to continue baking bread, as long as you keep feeding it and keep it nourished.
Mix together 100ml warm water with 50g of each of the flours. Cover the container with a wet tea towel and leave in a warm corner of your kitchen for 48 hours.
After 48 hours, the starter should be beginning to grow some small bubbles and will smell slightly beery. If nothing has happened yet, cover the container and leave for another 24 hours.
Discard half of the starter, and mix in another 100ml warm water, 50g each of white bread flour and dark rye. Cover with a wet tea towel again and replace in the warm corner for another 24 hours.
Repeat the discarding and again add 100ml warm water and 50g of each of the flours, cover with the tea towel and leave to ferment for another 24 hours. The starter should be more and more bubbly each day and the smell will become more sour and tangy.
Repeat the process for two more days. By this time your starter should be good and ready to make bread!
You can keep your starter indefinitely; if you keep it out, it will need feeding with flour and water every day, or you can keep it in the fridge and feed it once a week
Ontdek de verschillende brood types
Als je eenmaal een eenvoudig broodrecept onder de knie hebt en vertrouwd bent geraakt met enkele van de universele technieken en vaardigheden, kan je ontdekkingsreis in de wereld van brood echt beginnen.
Brood kan worden gebakken met verschillende soorten meel en met een enorme hoeveelheid aan ingrediënten die de smaak, textuur of kleur volledig kunnen veranderen. Het kan worden gemaakt met of zonder gist, zoet of hartig. Er zijn zoveel verschillende soorten brood van over de hele wereld om uit te proberen. Als je eenmaal verliefd bent geworden op het bakken van brood, is er eigenlijk geen weg meer terug.
Brood maken zonder gist
Er zijn tal van broden die je kunt maken zonder gist te gebruiken, zoals sodabrood, naanbrood of tortillawraps. Het niet gebruiken van gist in een recept zorgt meestal voor sneller bakken, omdat je niet dezelfde lange rijstijd hebt. Dat is waarom gistvrije broden vaak snelle broden worden genoemd.
Gistvrije broodrecepten bevatten vaak een ander rijsmiddel, zoals bakpoeder of zuiveringszout, of gebruiken eieren of boter om het brood wat lift te geven.
Verrijkt deeg gebruiken
In tegenstelling tot uw standaarddeeg dat doorgaans slechts vier ingrediënten bevat (water, meel, gist en zout), bevat verrijkt deeg minstens één extra ingrediënt, meestal eieren, melk, suiker of boter. Deze zijn er om vet, kleur of smaak toe te voegen. Door te bakken met verrijkt deeg ontstaat een grote verscheidenheid aan zoete en hartige broden, zoals brioche, maisbrood en challah.
Als het gaat om het gebruik van verrijkt deeg, zijn er een paar dingen waarmee u rekening moet houden om ervoor te zorgen dat u de perfecte bak krijgt:
Veel verrijkende ingrediënten verzwakken de glutenstructuur van het deeg, dus verrijkt deeg heeft vaak meer kneedtijd nodig. Het gebruik van een keukenmixer met een deeghaak voor deze fase zal de zaken echt versnellen en je armen een welkoms pauze geven!
Houd rekening met een langere rijsfase, aangezien verrijkt deeg meestal een langzamere fermentatietijd heeft.
Verrijkt deeg is meestal natter en daarom wat slordiger om mee te werken. Door je kom te koelen, blijft het deeg stevig en is het gemakkelijker te hanteren en te vormen.
Hoe zie je wanneer het brood klaar is
Bakkers hebben de neiging om op drie eenvoudige controles te vertrouwen om te beslissen of hun broden gaar zijn:
Kijk: de kleur van je brood zou je een goede indicatie moeten geven van hoe bijna klaar het is. Het hangt natuurlijk af van het recept, maar voor de meeste broden ben je op zoek naar een egale goudbruine korst die stevig aanvoelt en droog is. Als het nog steeds erg bleek is, heeft het nog een paar minuten nodig.
Luister: Geef de bodem van je brood een goede tik met je vingertoppen. Als het hol klinkt, is het klaar om uit de oven te komen. Als het geluid nog steeds gedempt is, plaats het dan nog een paar minuten terug en controleer het opnieuw. Hoe meer je bakt, hoe gemakkelijker het voor je zal zijn om het geluid waar je naar luistert te herkennen.
Temperatuur: U kunt ook een snel afleesbare thermometer gebruiken om de interne temperatuur van uw brood te controleren. De meeste broden zijn klaar met bakken op ongeveer 190-200℃.
What happens if my bread isn’t rising
After pouring all that time and love into making homemade bread, it can be very disheartening when your dough doesn’t rise to the challenge. There’s a bit of science behind the art of baking bread, and if one element isn’t quite right it can lead to less than perfect results. But don’t panic if your bread hasn’t risen properly this time-here’s what could have gone wrong (and remember, practice makes perfect!):
Check the date on your yeast to see if it’s expired. Yeast is an active organism with an infinite shelf life. After its expiry date it won't be able to do the job so effectively- or at all. That’s why if you're using dried or fresh active yeast you should always prove it before you start making your dough.
The water you use to prove the yeast may be too cold. Yeast needs moisture and warmth to get to work and so the water needs to be warm- basically about the same as blood temperature. An easy way to check is simply to put your finger in it-if you don’t notice a change in temperature it should be about right.
What happens if my bread is over-proved
Over-proved bread is dense and deflated. This is because the gluten has been over-stretched, causing the dough to essentially collapse.
Proving times will vary depending on the recipe. You can check the dough by poking it with your finger; if the dough springs back quickly, it means that there is too much air and it's over-proved. If this happens, press out the air, reshape the dough and prove again.
How to store homemade bread
Homemade bread is best eaten within 24 hours of baking, but should last 3-4 days if stored in a bread bin or other container such as a reusable linen bag.. Warming bread that’s a couple of days old in a hot oven for a few minutes will give it a quick refresh, and it will still make great toast. To avoid freshly baked bread becoming damp and mouldy it is important that you don’t store it away until it is completely cooled.
If you can’t work your way through the whole loaf in time remember you can freeze it. Once your bread has cooled slice it into individual portions and then double wrap each portion using cling film and foil to keep the air out. This way, next time you want some you only need to thaw what you need, rather than the whole loaf.
Make sure you label bread with the date and what type of loaf it is before freezing. Frozen bread should be used within six months.
Why is my bread dry?
This can happen when you add too much flour to your dough and not enough water. This sometimes happens during the kneading process when people are worried their dough is too sticky and so they add more flour. Or if they haven't kneaded it enough.
Why is my bread so dense?
A dense heavy loaf may be the result of not kneading the dough for long enough, as the gluten hasn’t had the chance to properly develop. After kneading your dough should feel flexible and stretchy. Bakers often use what is known as ‘the windowpane test’ to check how well the gluten structure has developed. Take a small piece of dough and hold it up in front of the light. Using the thumb and first two fingers of each hand gently stretch the sides away from each other. A well-developed dough structure will stretch thin without tearing and allow the light to shine through it. If the dough tears the gluten isn’t fully developed yet and needs further kneading.
Remember that some heavier flours such as whole wheat or rye will produce a heavier loaf. If you want to keep that airier texture but still want those more complex flavours try mixing these flours with a white bread flour.
What flour should I use?
When you're baking bread you need to use a strong flour with a higher protein level than the flour you’d use when making cakes or biscuits. This is because the higher the protein, the more gluten there is, and it’s the gluten that acts as the ‘glue' to help bind the dough and give it structure.
If you’re new to baking bread we recommend you start by using a strong white bread flour. Once you’re feeling more confident you can move on to experimenting with different types of flours, such as wholemeal, rye or spelt, which can really change a bread’s flavour, colour and texture. Each will need to be worked differently, and you may need to adjust your recipes to accommodate more kneading or proving time, depending on what flour you're using.
Types of yeast
There are three main types of commercially used yeast- active dry, fresh and fast action. All of them act as a leavening agent, causing the dough to rise, but have different properties.
Active dry yeast Most commonly in granule or powder form, active dry yeast is popular with home bakers because it’s easy to get hold of and convenient to use. Before it’s added to the other ingredients, it needs to be proved. Essentially this is to check the yeast is still active and able to produce the bubbles in the dough that make it expand. To prove dry yeast you just combine it in a bowl with lukewarm water and allow the mixture to stand for 5-10 minutes until a bubbly foam starts to form on the surface. You can then add it to the rest of your ingredients
Dry yeast should be stored in a cool dry place and can be used up until the recommended use by date (but not after, or you’ll risk a sunken loaf!)
Fresh yeast Coming in a solid form (often as a bar or cake), fresh yeast also has to be proved or activated by adding it to warm water. Once you’re proved fresh yeast you crumble it into the dry ingredients.
Fresh yeast used to be a lot harder to come by- and expensive, which is why it was mainly used by the professionals. These days you can often find it in delis or the chilled aisles of some supermarkets. It needs to be stored in the fridge and has a much shorter shelf life than dry yeast, up to about three weeks. For the best results it should be used at its freshest.
Fast action yeast Sometimes referred to as instant or quick-rise yeast, the major difference between fast action yeast and active dry or fresh is that it doesn’t need to be activated in water before it’s combined with other ingredients. This makes it a quick and convenient choice for regular bakers, and it can easily be substituted for dry yeast in most recipes.
As with dry active yeast, fast action yeast should be stored in a cool dry place and used before the expiration date.
Ready to make your own homemade bread? Get started with Kenwood.
Bread making is such a joyful and satisfying activity, and our range of stand mixers are designed to help you enjoy the process of transforming simple ingredients into something truly delicious.
For some inspiration for your next bake why not check out our bread recipes?